If you spend enough time on social media (and we know you do), you must have encountered at least a page or two that are dedicated to creating “the ultimate gaming setup”. Since LED lighting has become an integral part of our everyday lives, they have become a staple of gaming setup looks and the reason is more than their cool appearance.
LEDs in your dedicated corner can have a positive effect on your mood and cognitive functions, whether you’re gaming, studying, resting, or engaged in any other activity you love.
However, as much as we love LEDs, we feel most content creators over do it. Understanding light and how light “works in a scene” is an art, and most often than not, the less the better.
So when you consider introducing LEDs into your environment, don’t think big or that you have to buy a lot. Take time to plan and try out how different lighting products work in your own environment. It doesn’t have to be big or perfect, just YOURS, even if it is small and humble.
We live in crazy days when LEDs are available in an abundance of shapes, sizes, functions, and at different price points. This means you can create terrific results on a wallet-friendly budget and don’t have to go for expensive products.
Let’s explore how to add LEDs to your gaming setup and the benefits they bring.

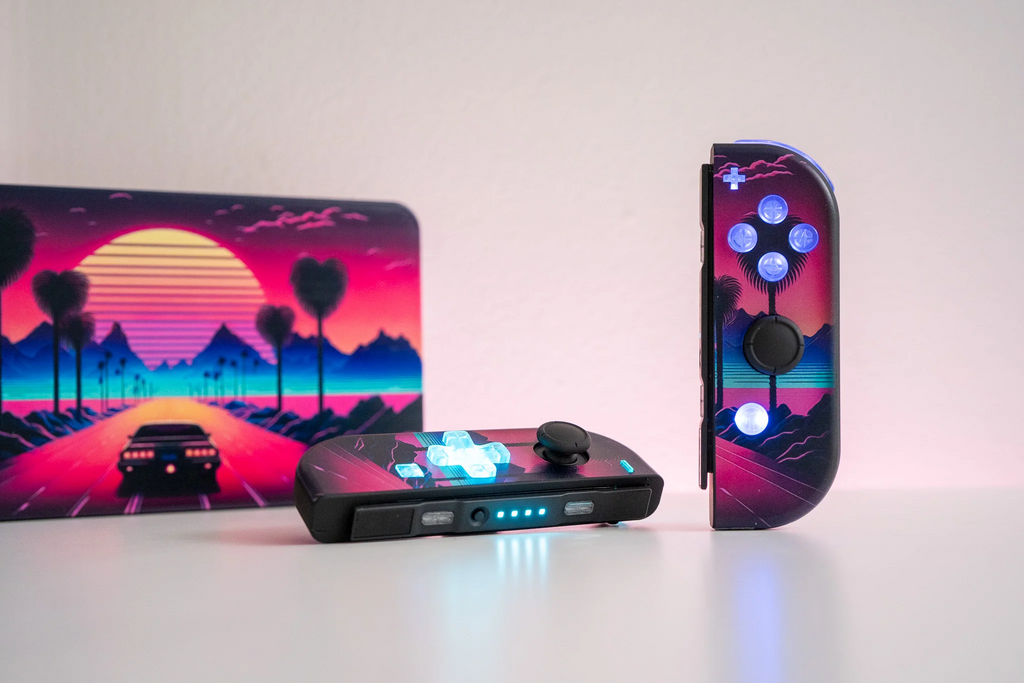
Synthwave Joy-Cons with LED backlit buttons.
What are LEDs and How Do They Work?
LED stands for Light Emitting Diode. Unlike traditional incandescent bulbs, LEDs are solid-state devices that emit light when an electric current passes through them. They are highly efficient, durable, and come in a variety of colors. LEDs work by converting electrical energy into light energy, producing vibrant and eye-catching illumination.
So how do you even start introducing them into your gaming setup? Here are a few basic steps.
Step 1: Choose the Right LEDs
The first step in adding LEDs to your gaming setup is selecting the right LEDs. You may opt for a classic LED strip, so consider the length, color, and brightness of the strips. RGB (Red, Green, Blue) LED strips are a popular choice as they allow you to customize the colors to match your gaming mood. Look for LED strips that are easy to install and come with adhesive backing for hassle-free application that will also let you change their placement if you are unhappy with it. You can even use a bit of your own tape to keep them in place, which will help you do a bit of trial and error.

Retro Futuristic:
An atomic purple Pro-Controller with LED backlit buttons.
Step 2: Plan Your Placement
Before installing the LED strips, plan where you want to place them. Common areas include the back of your monitor, underneath your desk, or along the edges of your gaming desk. It’s also important to plan proximity to a power source, since most LEDs require a USB power source.
Take measurements and ensure you have enough LED strips to cover the desired areas and be creative.

Minimalistic and soothing:
White PS5 controller with backlit LED buttons.
Step 3: Prepare the Surface
Don’t be lazy, and clean the surface where you will be applying the LED strips. Dust and debris can affect the adhesive's effectiveness. Use a mild cleaning solution and a soft cloth to ensure a clean and smooth surface for optimal adhesion.

Transform your Nintendo Switch:
Joy-Con LED mods.
Step 4: Install Your LEDs
For LED strips, peel off the adhesive backing of the LED strips and carefully stick them to the planned areas. Start from one end and slowly press the strip down, ensuring it adheres firmly. If needed, use additional adhesive or clips to secure the strips in place.
Any other LED lighting element will only require planning proximity to a power source or wall outlet. Try different placements and see what works best for your space.
Step 5: Connect Your LEDs
LED strips usually come with connectors that allow you to link multiple strips together. Follow the manufacturer's instructions to connect the strips and ensure they are properly aligned. Double-check the connections to avoid any potential issues.

Cute and pastel can also be LED lit for extra kawaii vibes.
Step 6: Power Up and Customize
Connect the LEDs to a power source, such as a USB port or a dedicated LED controller. Once powered up, take your time and customize the lighting effects, colors, and brightness using software or a remote control, depending on the LEDs you decided to go with. Let your creativity shine and create an ambiance that matches your style.

Stealthy and dark Xbox LED controller.
Did you know? The Benefits of LED Lighting
Adding LEDs to your space offers several benefits:
1. Enhanced Immersion: LEDs create a captivating gaming environment, making you feel more connected to the virtual world or boost your mood vibes, like reading, studying, resting, etc.
2. Reduced Eye Strain: Proper lighting can help reduce eye fatigue during long gaming sessions, allowing you to play comfortably for extended periods.
3. Personalization: Most LEDs offer customization options, allowing you to personalize your gaming space and showcase your unique style.
4. Aesthetics: LEDs add a visually appealing element to your gaming setup, elevating its overall aesthetics and making it stand out.
5. Improved Focus: The right lighting can help improve your focus and concentration, enhancing your performance.
